Prairie River Bridge | Truss Sides
Dec 4, 2022
Introduction
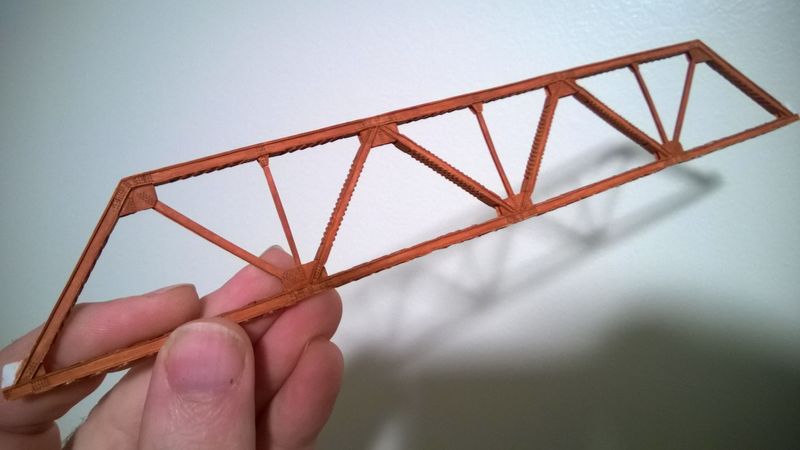
After finishing the assembling the three trusses but they still need some more detailing. Before starting work on the floor beams, I will be applying Archer Fine Transfers N Scale Resin Rivet decals and adding several thin layers of DecoArt Americana Burnt Sienna acrylic flat base coat to the remaining unfinished sides of the trusses. After the sides are finished, I will be ready to start work on the floor beams and stringers that will eventually support the deck. I also need to do some design work on the steel towers at the ends of the main span.
The sides of the outer girders could not be detailed until the connector plates are in place. The inner pieces of the trusses were detailed as the they were assembled. The outer edges of the trusses will remain undetailed for now to prevent any accidental damage during handling. The top edges are mostly backing plates with long strips of rivets to hold the plates on to the side channel flanges.
Connector Plates
There are still some details that needed to be added to the sides of the trusses. There are joints between the top and bottom chords where they join together at the gusset plates. By using connector plates to reinforce the joint between the 34-foot chords, they could have been prefabricated and brought to the construction site on flat cars.
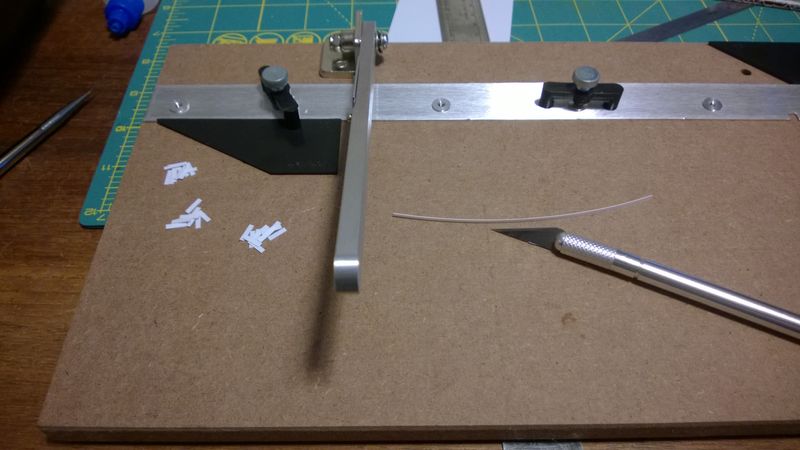
A scrap piece of 0.010" styrene sheet from Evergreen Scale Models is cut into 0.090" strips and cut to scale four-foot lengths to create the straight connector plates. Using a cutting tool like the "Chop-It" from MicroMark shown in Figure 1 makes this easier and makes sure that all of the pieces are cut to the correct length. This one was purchased at the MicroMark booth at TrainFest in Milwaukee.
Rivets
The connections plates in the side channels have two 9x9 sets of rivets to fasten the side channel to the gusset plates. Another two 9x9 sets of rivets fasten the connector plates to the side channel, as well as the gusset plates underneath. The gusset plates on the lower ends of the end posts at the ends of the trusses do not have the additional connector plates in the side channels. Sets of rives connect these gusset plates directly to the side channels. Rivets are not added where the bridge shoes mount to the ends of the trusses.
The verticals have four vertical strips of three rivets in the middle of the top chords to fasten the plate that connects the top of the verticals to the center of the top chords. There are also two vertical strips of three rivets on the connector plate in the side channel to fasten the bottom of the verticals to the ends of the bottom chords. The connector plates in the side channels of the top chords have a two vertical stris of three rives to fasten everything to the small piece of "I" beam that keeps the gusset plates separated.
Detailing
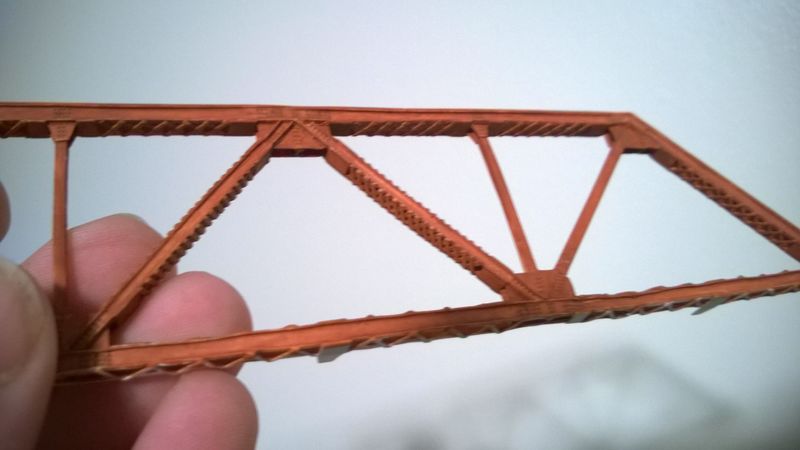
Working clockwise around the truss a section at a time, rivet decals are applied to the first end post, the first top chord, and the top of the first vertical. Several thin layers of base coat are applied to the first section as shown in Figure 3. The base coat is feathered to prevent a hard edge between the first and second sections.
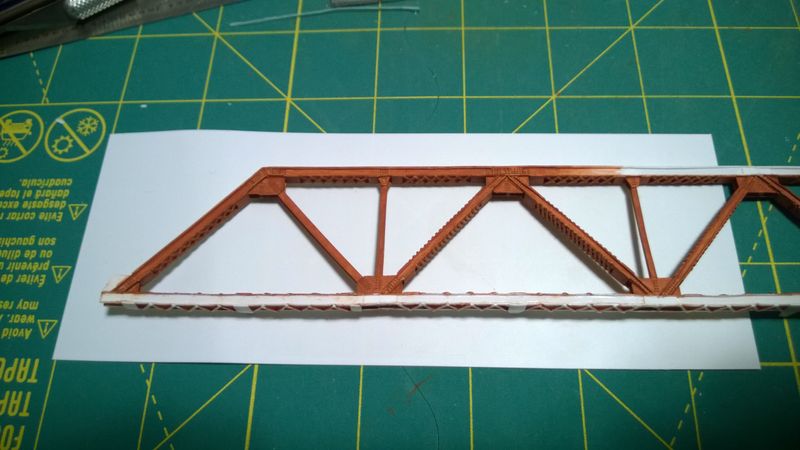
Rivet decals are applied to the top of the remaining two verticals and to the connector plate connecting the second and third top chords. Several thin layers of base coat are applied from the end of the first section to the end of the second section as shown in Figure 3. Similar to the first section, the base coat is feathered near the end of the third top chord to prevent hard paint edges.
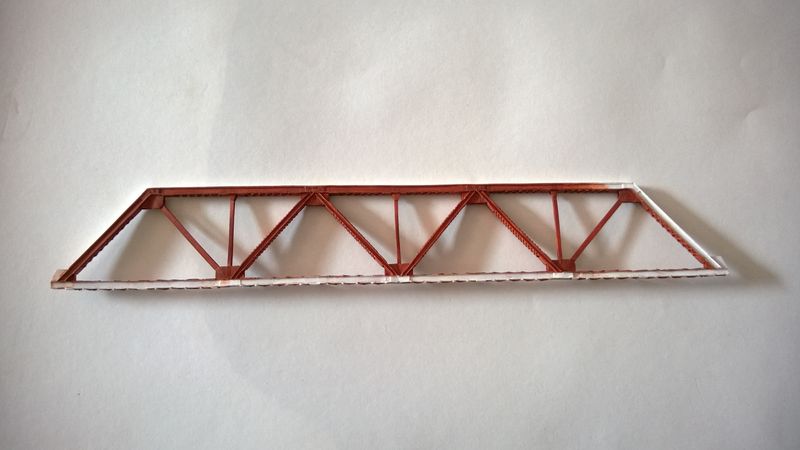
Rivet decals are applied to the second end post and the first two bottom chords coming back the other direction. Several thin layers of base coat are applied from the end of the second section to the end of the third section as shown in Figure 4. This photo has a better view of the rivets at the various type of connection points as described earlier.
Conclusion
I added the rivet decals and applied several thin layers of base coat to the remaining section as shown in Figure 5. The ends of the gussets at the ends of the trusses were left unpainted for now. Those will be detailed in future posts. After completing the first side of the first truss, I repeated process for the other side of the truss and both sides of the other two trusses. Now that the sides of the trusses are done, I can start on the floor beams and stringers that connect the tops of the trusses and support the deck.
